
Export Periods or Games for Exchange:
Export Edit Files
Primarily used for exporting the full-length master files of an Edit or Master, for example, to export Period or Full Game files for Exchange in Hockey. Note: This will copy all files of an Edit to the target directory, typically not the desired outcome with edits containing multiple Master files.
- Right-click the Master file of the period or game you wish to export. Hover over Export and select Export Edit Files.
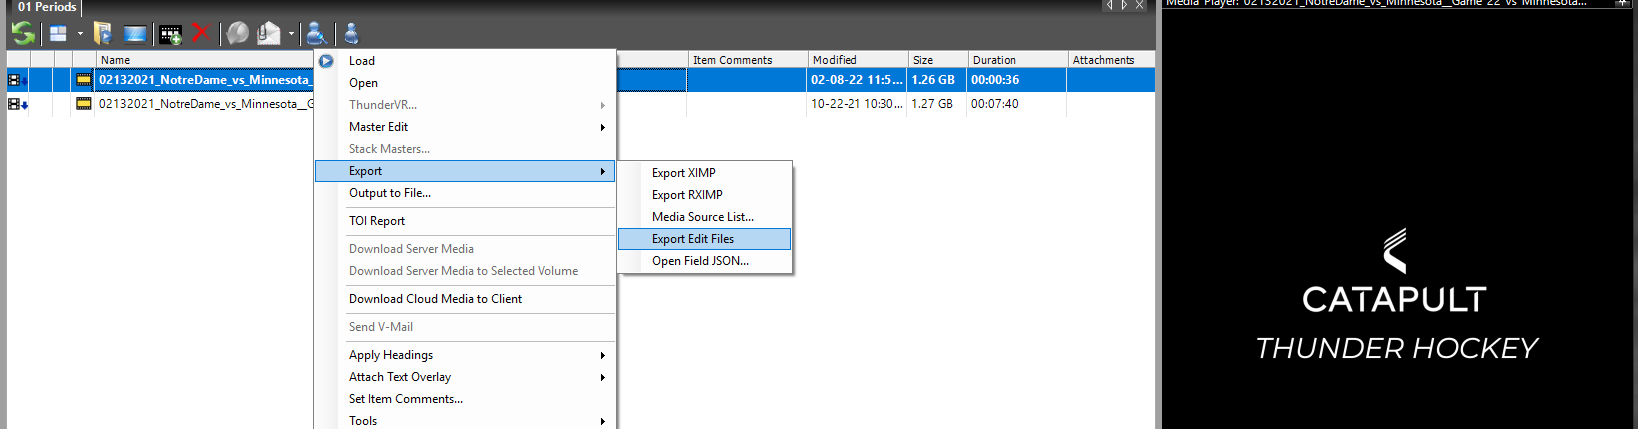
- Select the folder to output the file.
- The full media elements of the selected Master or Edit will be copied to the output directory selected.
MP4 video of playlist without Overlays, Drawings, Title Slides, or PPTs:
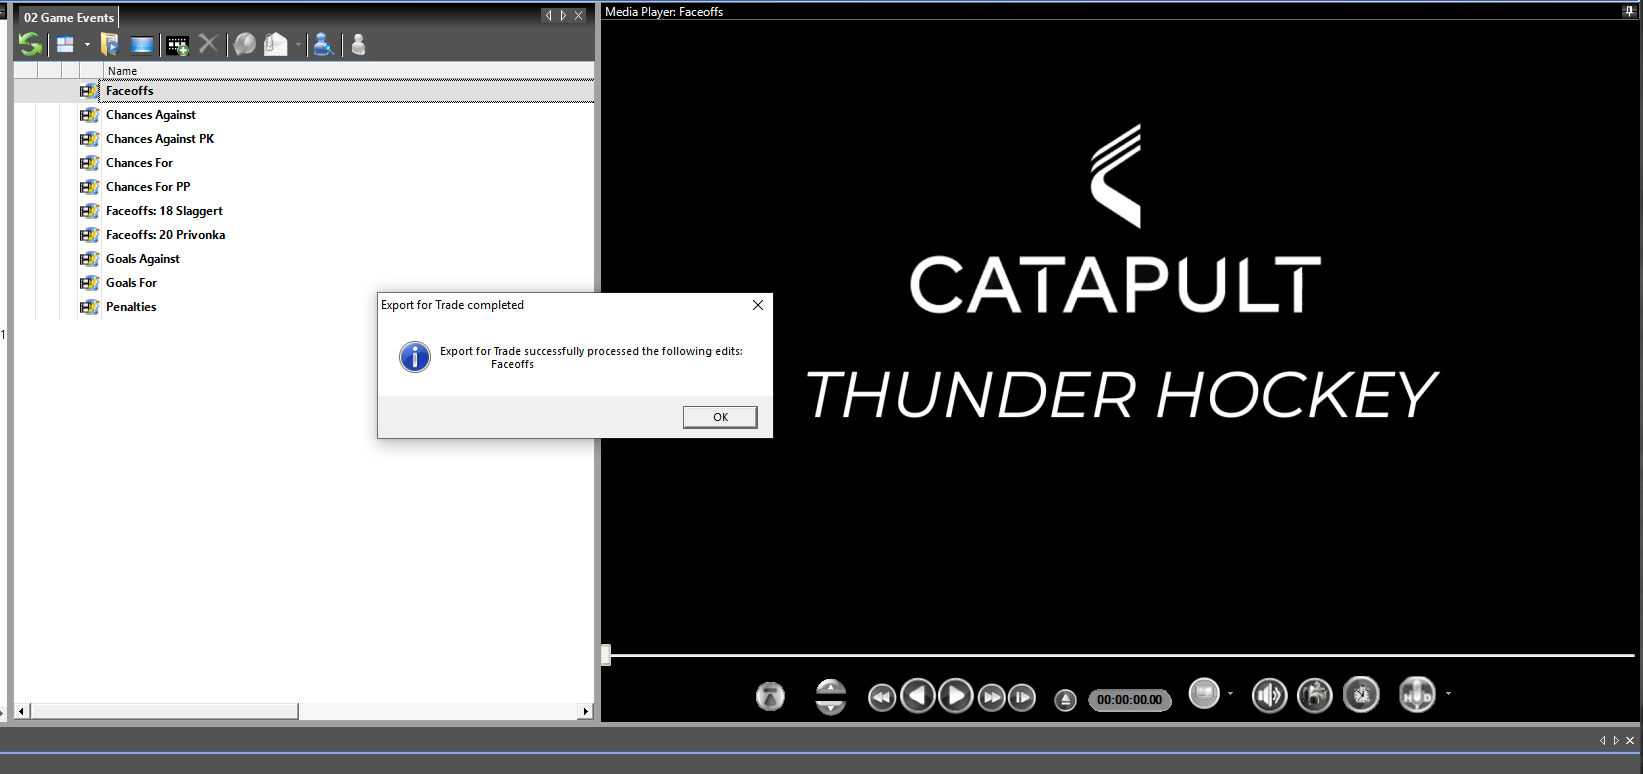
Export Plays for Trade
The fastest and preferred method to export an MP4 file of an Edit or an Autocutup is to use Export Plays for Trade. This is also the method to use in order to locally import media onto an iOS Device for postgame review.
- This can be done by right-clicking on the edit, hovering over Tools and selecting Export Video/Plays for Trade. A simple right-click and Export Vide/Plays for Trade selection is available on an Autocutup.

- An Export for Trade pop-up box will appear. Leave the League, Home Team and Away Team and Date alone. Select an Output Folder for the file to export. Check all views to be included and select Output file type: MP4 (the format will automatically adjust to the native format of the file in Thunder).

- The file will process and then output each play inside the playlist. A message that the Export for Trade Completed will appear when the file finishes.
MP4 Video Including Overlays, Drawings, Title Slides, and PPTs:
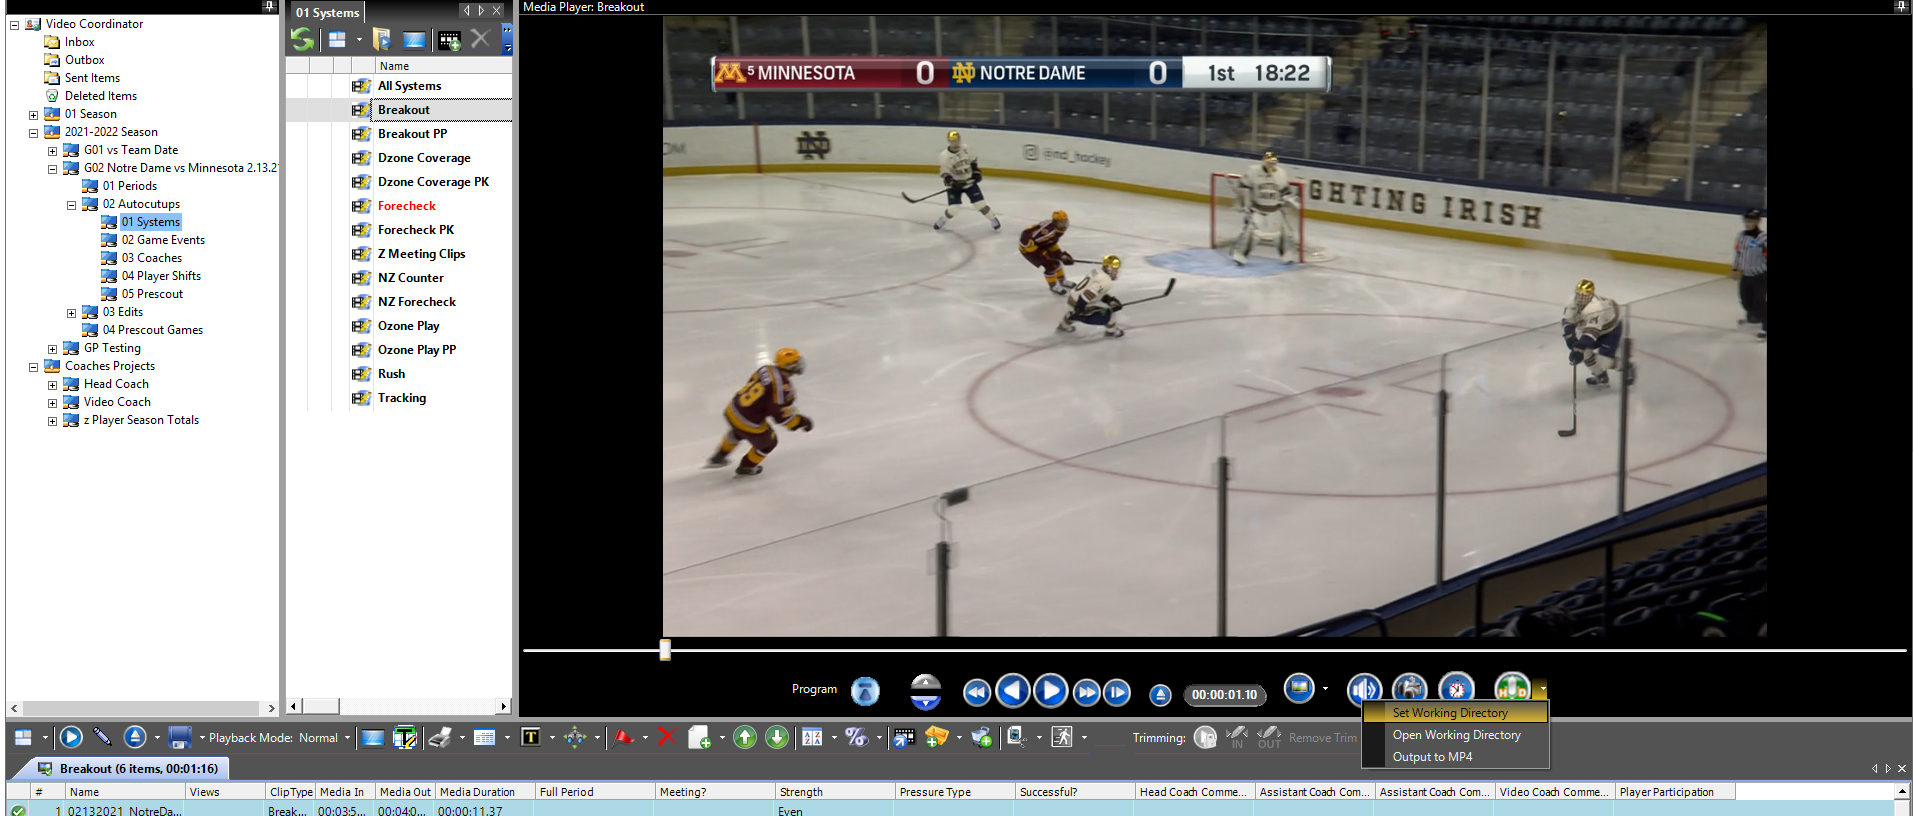
Voiceover/Output to MP4
The Voiceover tool is used to export video outside of Thunder with overlay data attached and slides included.
- Set the "Working Directory" to determine where the outputted file will go, typically the Desktop.
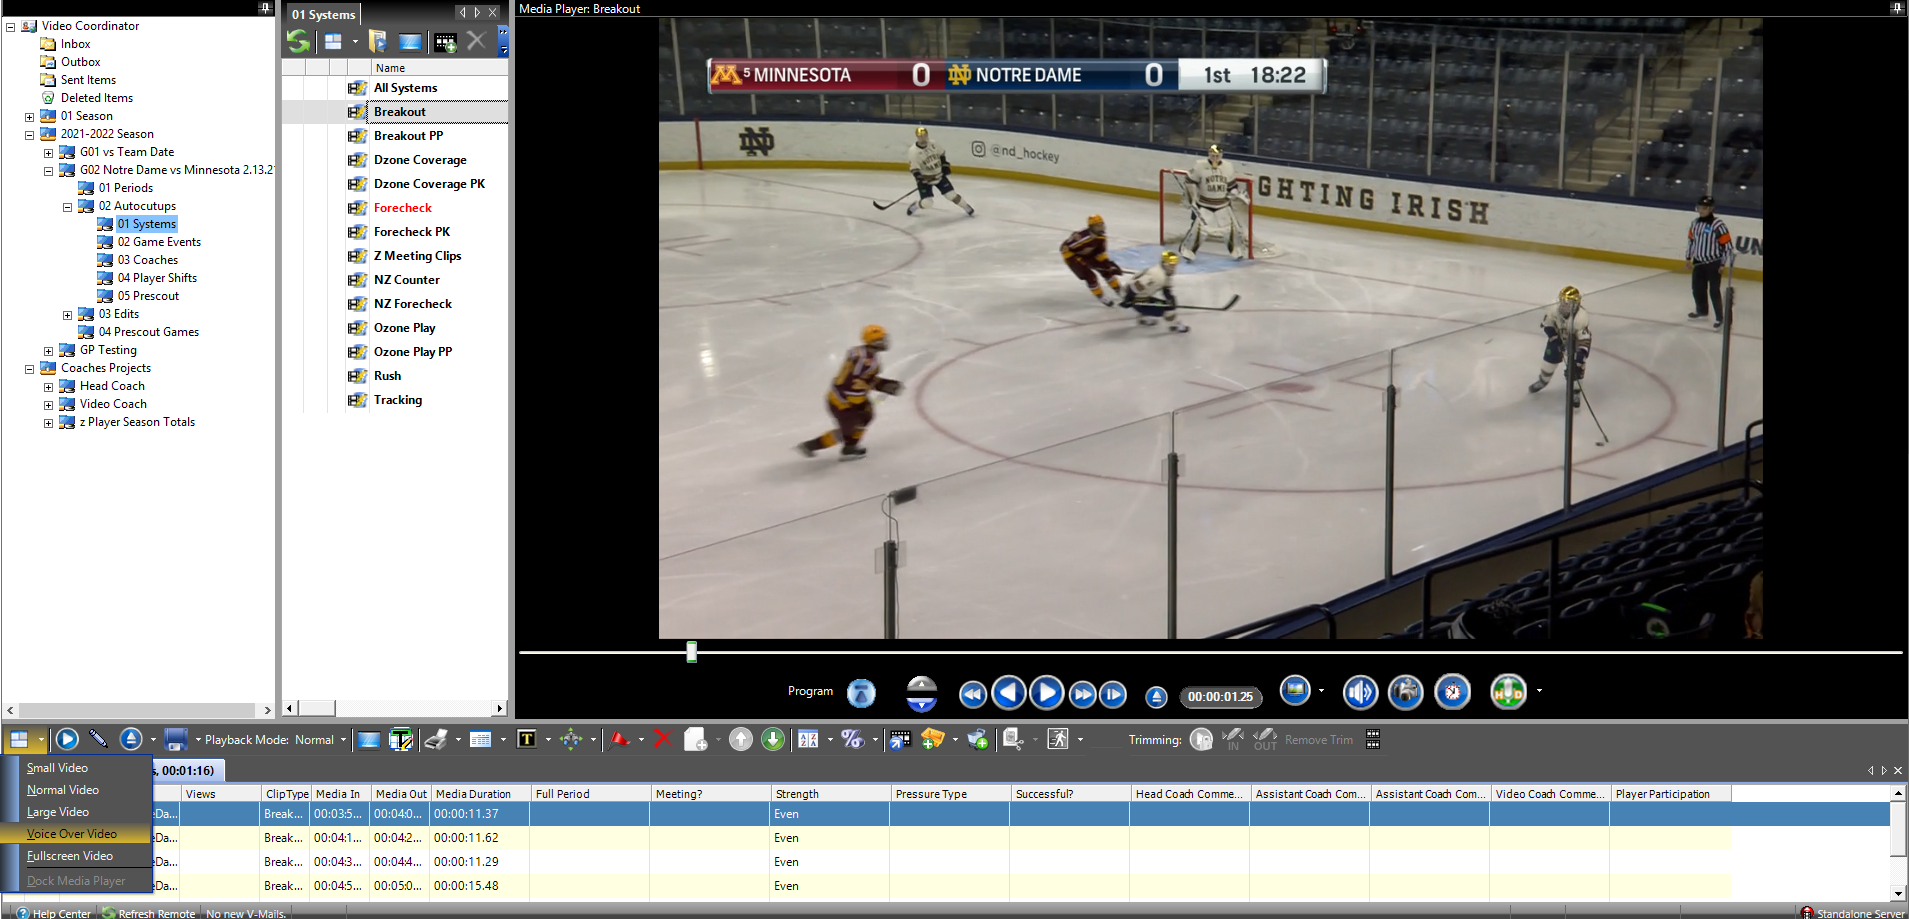
- Adjust the Screen Layout to "Voiceover Video" for best quality.
- Simply click the microphone icon in the media player control bar to begin the screen record of the Edit. The microphone will begin to flash red as the recording is in progress.
- The user controls the video playback and pauses, can speak into a USB or internal microphone to provide commentary over video, and either let the playlist come to an end or click the microphone button again to end the recoding.
- After the video has ended, a prompt to preview the video will appear and can be ignored (No).
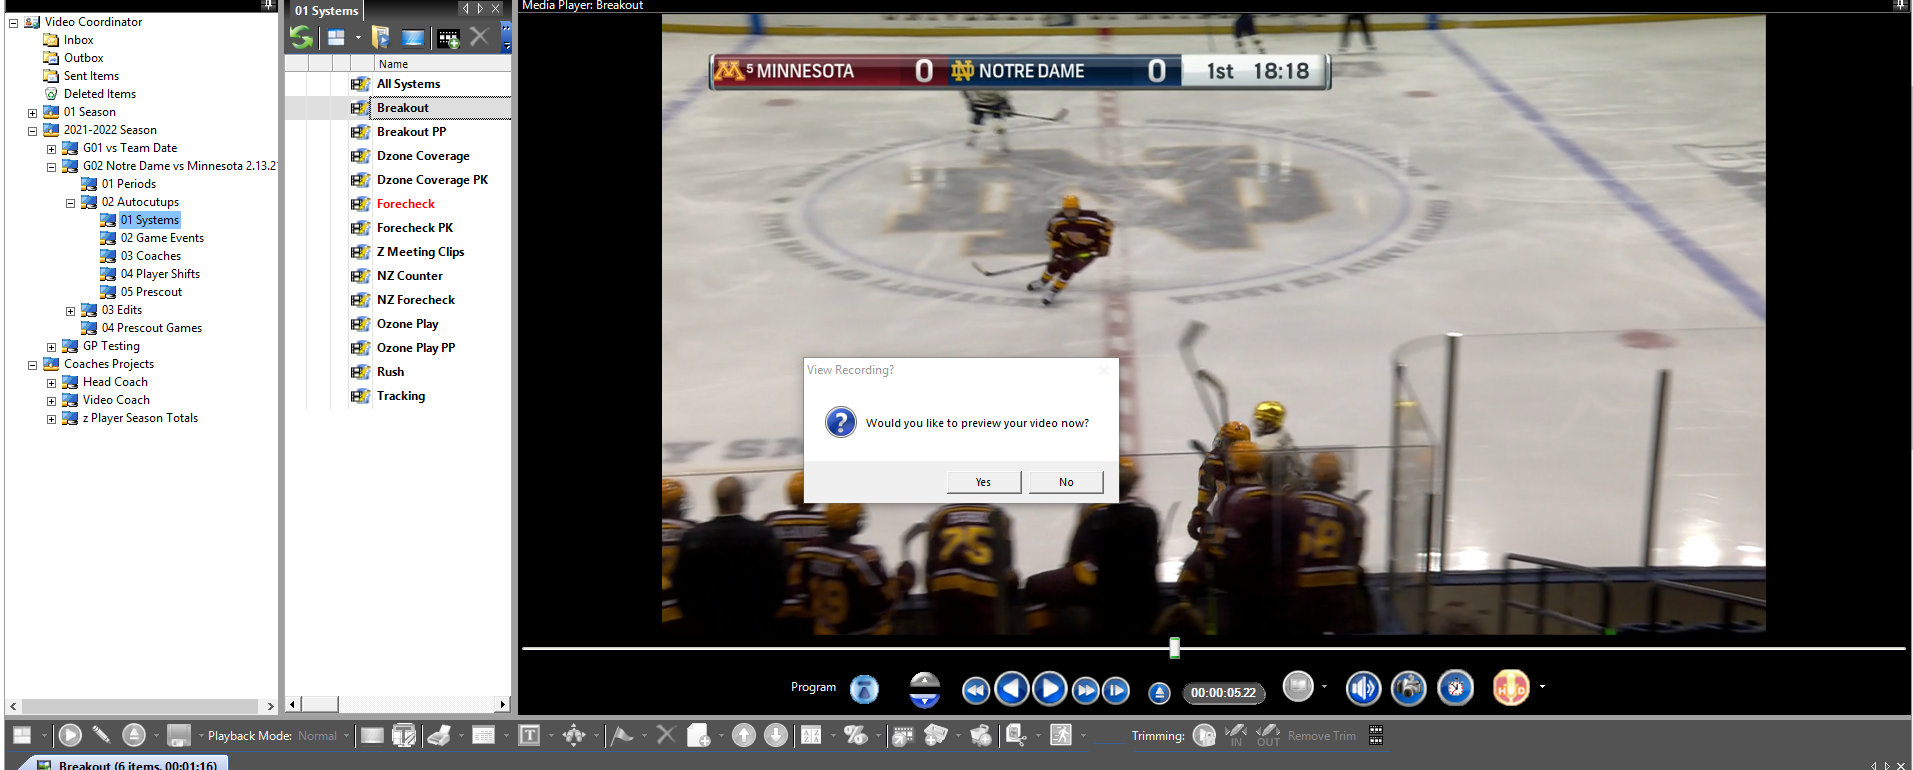
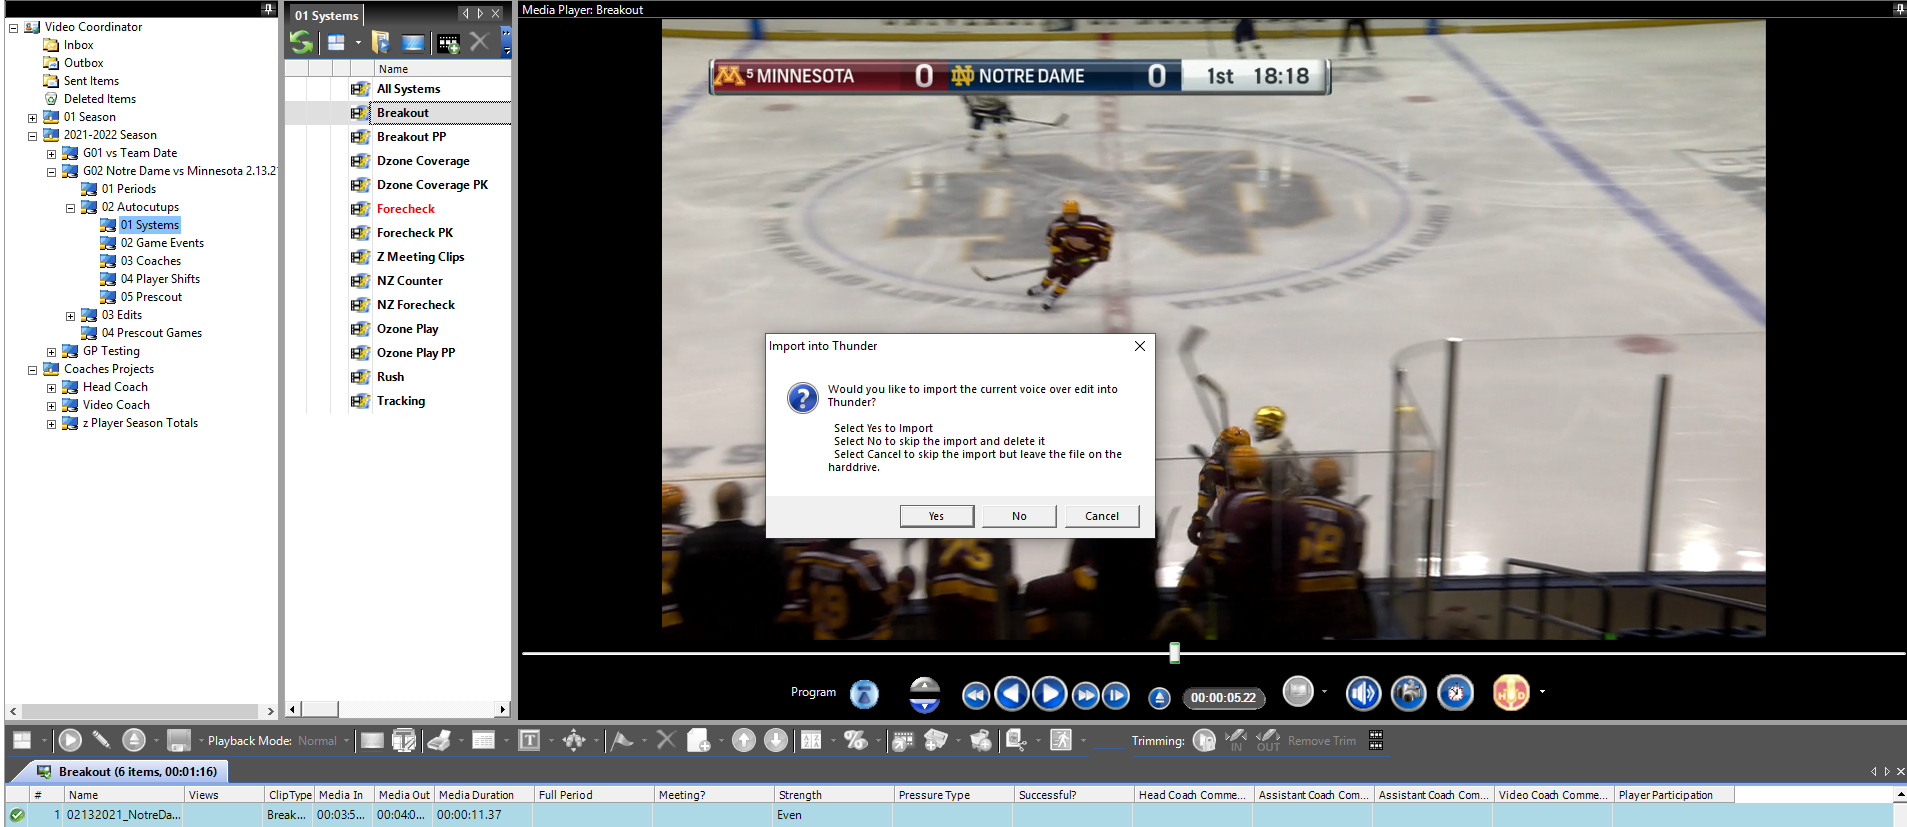
- The Import into Thunder option will then appear. If you would like to import the newly created MP4 with the voiceover into Thunder as a new edit in order to push it for use in ThunderCloud, you can select "Yes". If you want to skip the import and also delete the voiceover entirely, select "No". In order to skip the import into Thunder, but also keep the outputted voiceover file on the hard drive, select "Cancel".
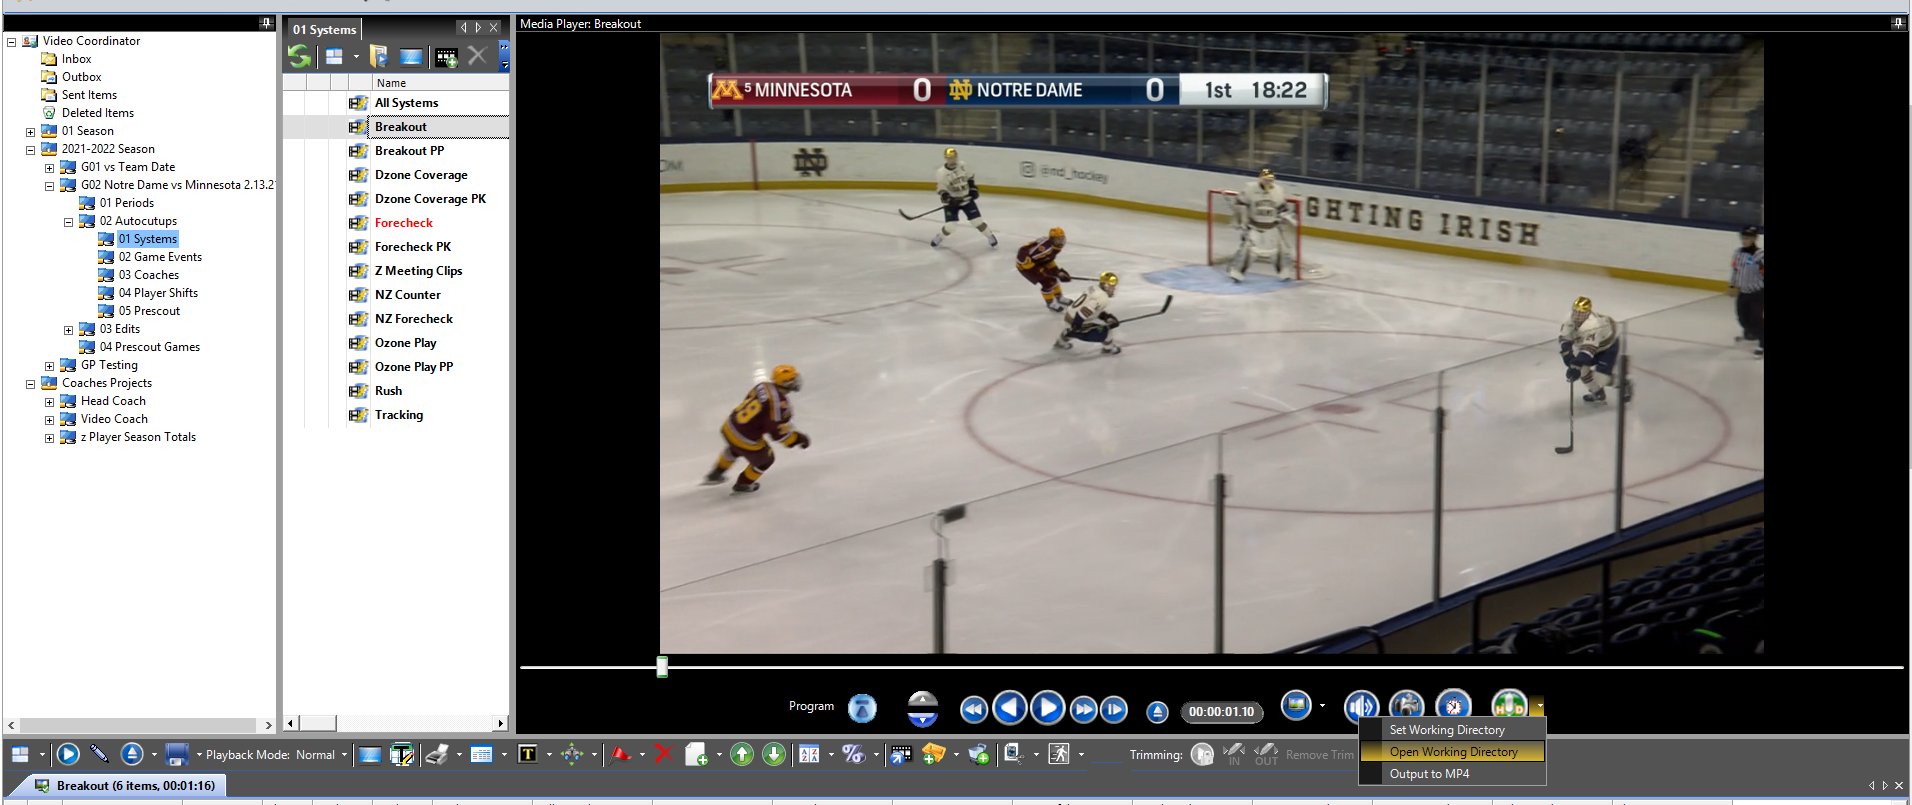
- Select the "Open Working Directory" option to navigate File Explorer to the .mp4 file.
Output to MP4 is used to screen record video files with overlays, title slides and PowerPoints without a microphone picking up audio.
- Adjust the Screen Layout to "Voiceover Video" for best quality.
- From the dropdown selector to the right of the Voiceover Tool, select Output to MP4.
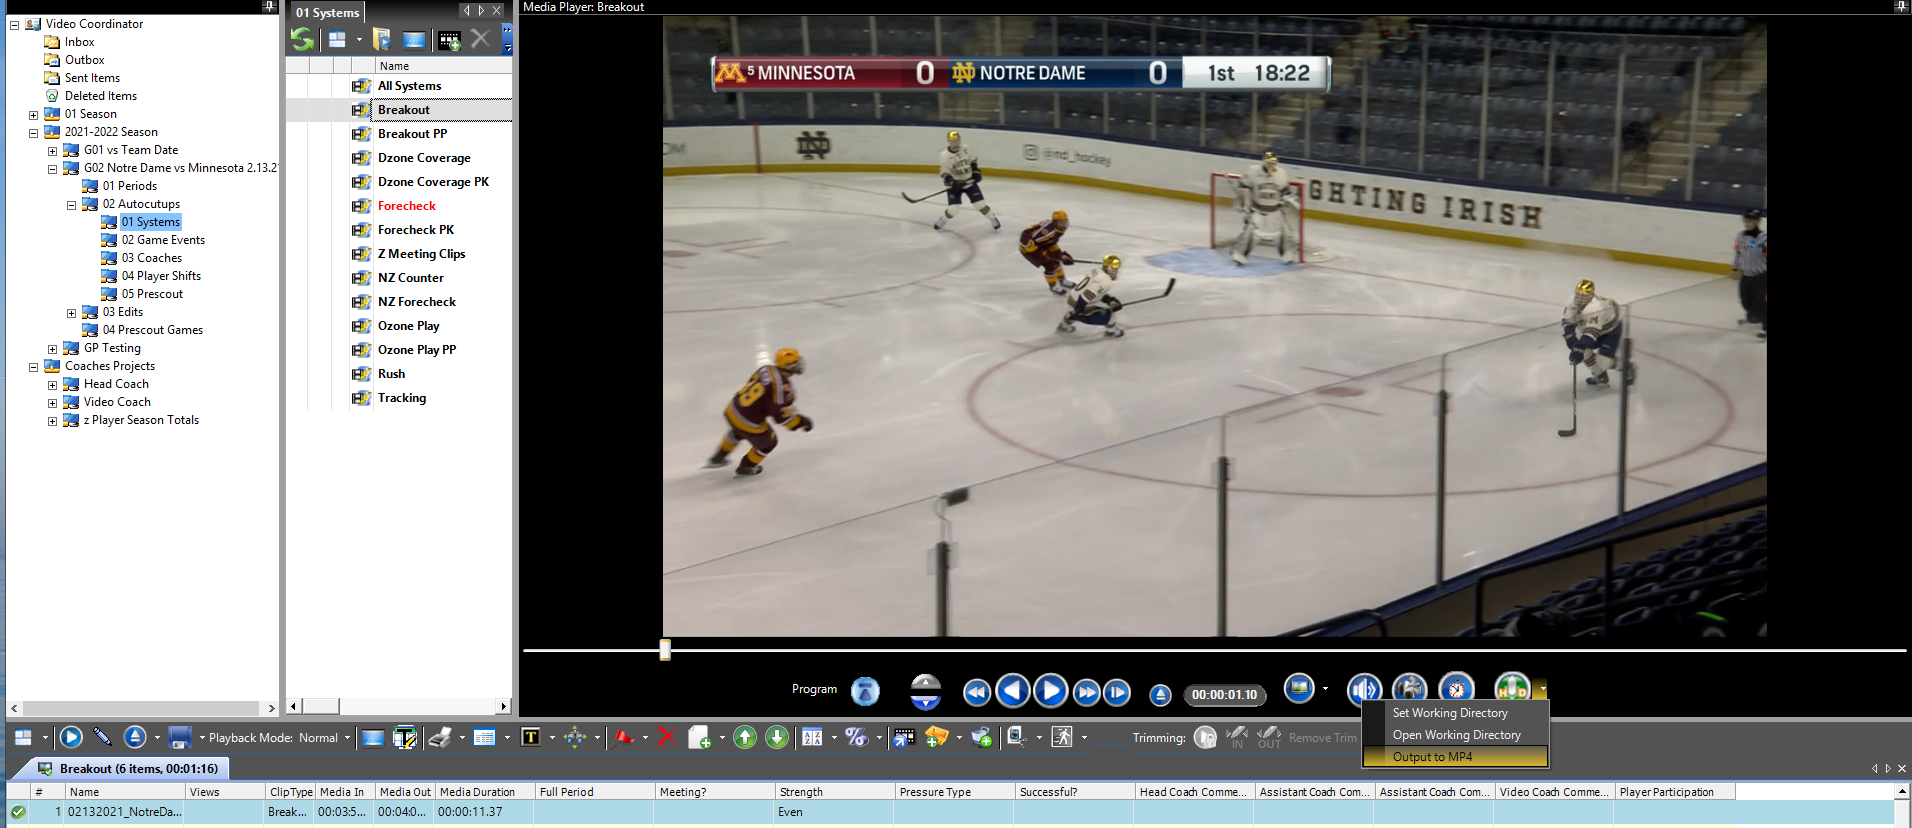
- Select the directory for the file to export to and select Save. (Note: This is different than the 'Working Directory" from the Voiceover Tool, but can be set to the same folder.)
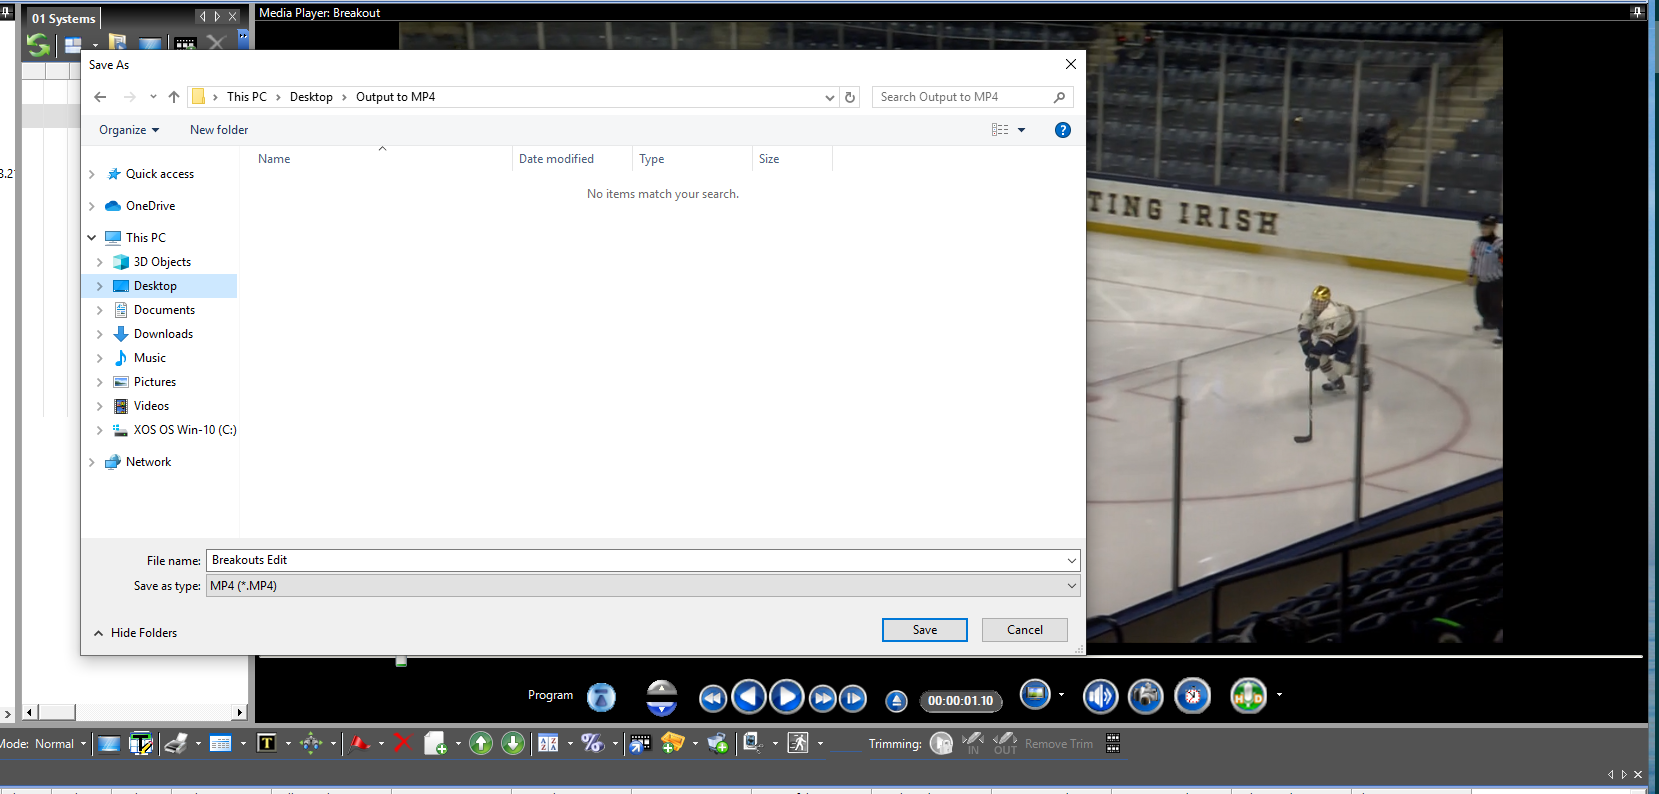
- The Edit will begin to play thru and the Voiceover Tool will flash red.
- The user controls the video playback and pauses, which will be recorded into the file.
- When the file finishes, it will be in the selected directory as an MP4.
Comments
0 comments
Please sign in to leave a comment.